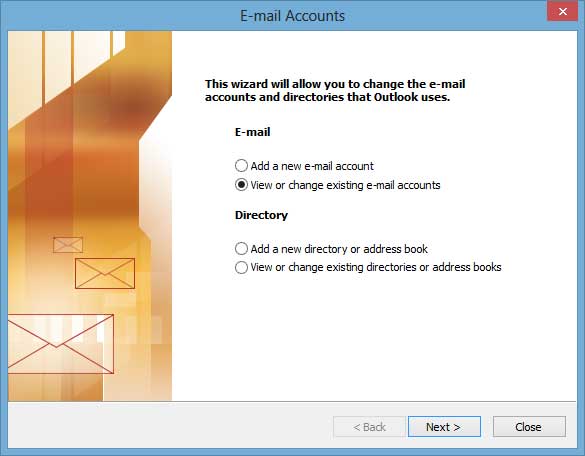
If you are updating an existing email account already in outlook, click View or change existing e-mail accounts. Or if you are adding a new account to outlook, click on Add a new e-mail account.
Then click Next >
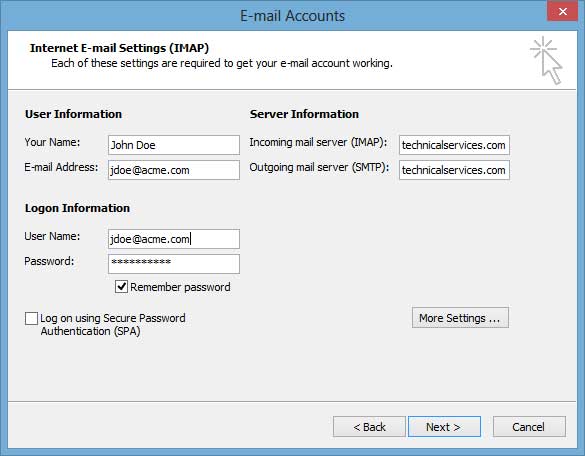
Click to highlight the email account you are trying to change and click Change... Or if adding a new account click Add...

- Enter your Name
- Enter your E-mail Address
- Enter your User Name. Your User Name is your COMPLETE E-mail address. Check this carefully as Microsoft will change this to be just the first part of your email address which is incorrect.
- Enter your password. ( note, if updating an existing account and your password is displaying as ******* then leave the password alone unless you are absolutely sure you have the correct password. )
- Enter the Incoming mail server and Outgoing mail server as zeus.deltatechnicalservices.com
- Click on More Settings...
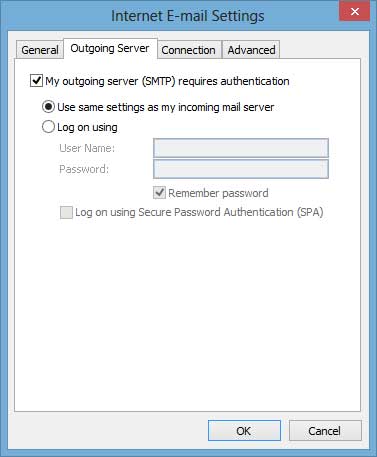
- Click on the Outgoing Server tab and be sure the box is checked that says My outgoing server (SMTP) requires authentication.
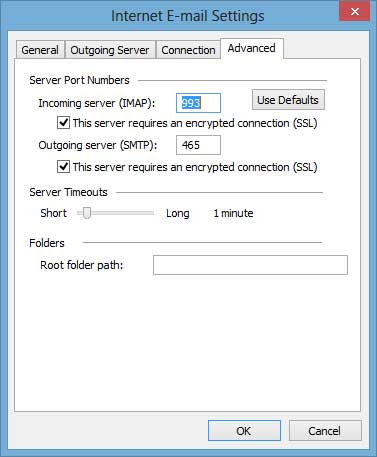
- Then click on the Advanced tab.
- Click both checkboxes that say This server requires an encrypted connection (SSL)
- Set the Incoming server (IMAP) to 993 as shown below
- Set the Outgoing server (SMTP) to 465 as shown below
- Click OK
That completes the settings changes, click on Finish and you are ready to send and receive email.
